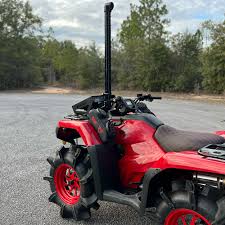
How to Change the Oil in a 2015+ Honda Rancher (Complete Guide)


How to Change the Oil in a 2015+ Honda Rancher (Complete Guide)
Keep your Honda Rancher running strong with this step-by-step oil change guide.
If you own a 2015 or newer Honda Rancher (420cc), regular oil changes are one of the most important maintenance tasks to keep your ATV running reliably — especially if you ride hard, play in mud, or put in long trail hours. In this blog, we’ll break down everything you need to know to change the oil in your Honda Rancher, including oil capacity, recommended oil type, tools needed, and a full step-by-step guide
2.9 quarts (2.7 liters) of Honda GN4 10W-30 oil (or high-quality ATV-specific 10W-30 motor oil)
Honda OEM oil filter (Part #: 15412-HM5-A10 or equivalent)
17mm socket and ratchet
Oil filter wrench
Drain pan
Funnel
Shop rags
Torque wrench (optional but recommended)
A new crush washer (optional but ideal for a perfect seal)

Without oil filter change: ~2.6 quarts (2.5 liters)
With oil filter change: ~2.9 quarts (2.7 liters)
Always check the dipstick to verify correct oil level after refilling.
Start your Rancher and let it idle for 3–5 minutes. This helps thin the oil so it drains more completely. Then shut it off.
Ensure the ATV is on a flat surface and properly secured so it won’t roll.
Locate the 17mm drain bolt under the engine.
Place the drain pan underneath and remove the bolt carefully.
Let the oil drain fully (this may take several minutes).
Replace the crush washer if you have a new one.
Reinstall the drain bolt and tighten snugly (torque spec: 24 ft-lbs).
Locate the oil filter cover on the front-right side of the engine.
Use an oil filter wrench to remove the old filter.
Wipe any old oil or dirt from the sealing surface.
Install the new oil filter with the rubber gasket facing outward.
Reinstall the filter cover securely.
Remove the oil fill cap on top of the engine.
Using a funnel, add 2.9 quarts of oil (with filter change).
Replace the cap and clean up any drips.
Start the engine and let it idle for 30 seconds.
Turn it off and wait a few minutes.
Pull the dipstick, wipe clean, reinsert, then remove again to check the level.
Add more oil if needed to reach the full mark.
Take the used oil and filter to your local auto parts store or recycling center.
Always use ATV-specific or Honda GN4 oil to protect your engine in extreme temperatures and dusty conditions.
Change your oil every 100 hours or 600 miles, or more frequently if riding in mud, water, or extreme terrain.
Mark your next oil change on a maintenance log to keep your machine running strong.

Item added to your wish List
Item added to your Compare List